How to do Amazon Listing Optimization to Boost Sales on Amazon?


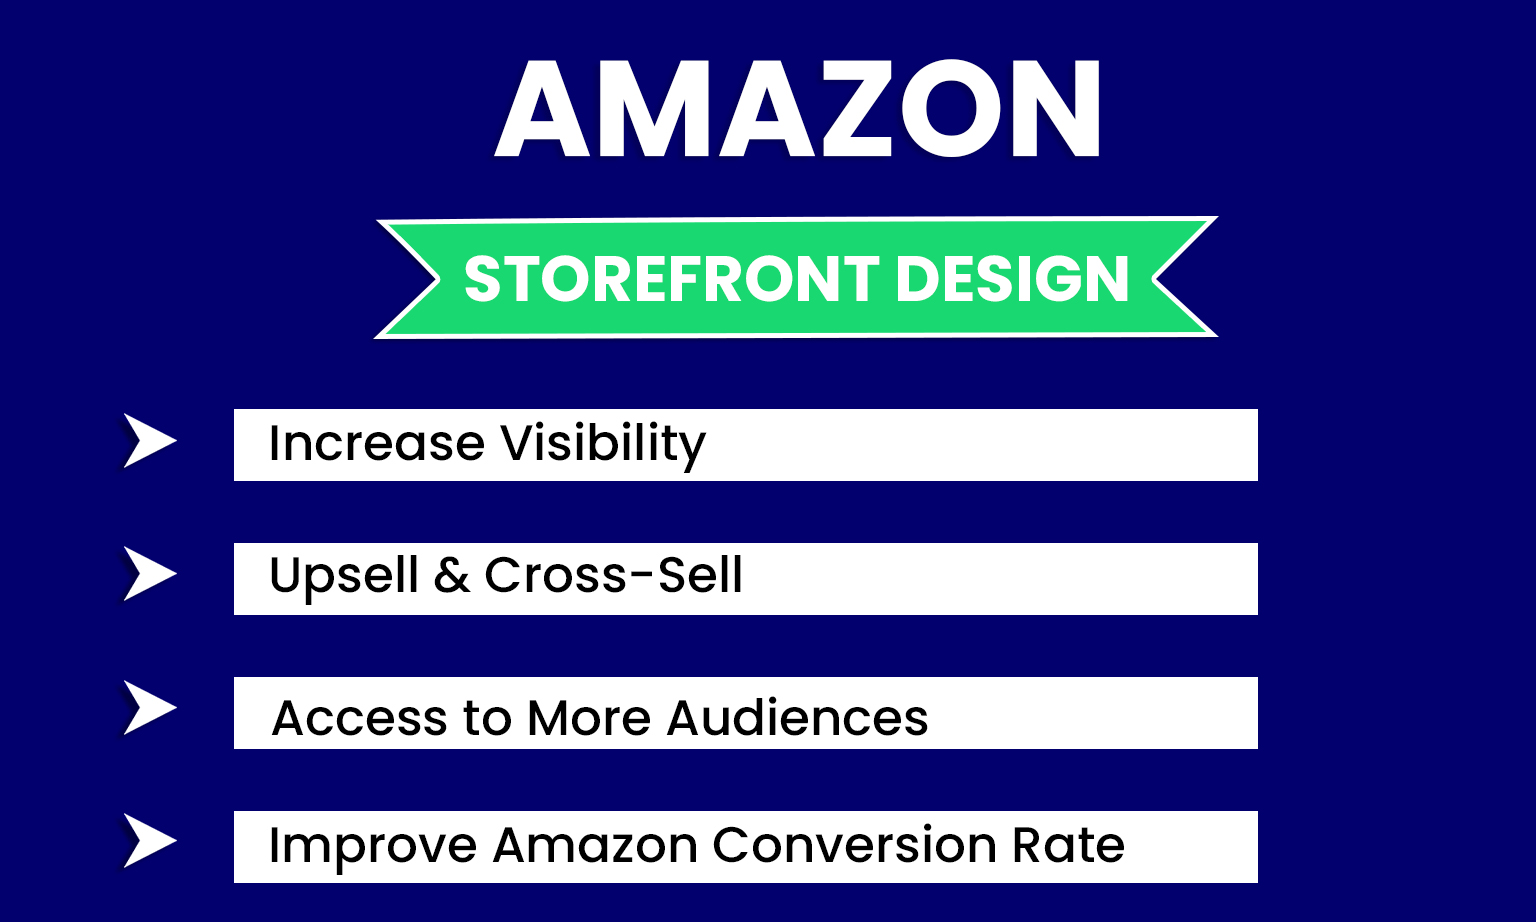
Grow your business with Amazon Listing Optimization

You might have seen that some products always remain on the top of the Amazon search engine, getting higher clicks and sales, while others hardly get the attention. So what exactly is making this difference? Several factors lead to success on amazon, but the most important among all is amazon listing optimisation. An informative and optimised amazon product listing has the power to persuade users to buy. 

In the blog, we will cover all the vital aspects and amazon product listing optimisation guidelines you can follow to drive sales and improve your ranking in Amazon search results.

Ways to Optimise Amazon Product Listing -

product listing on amazon

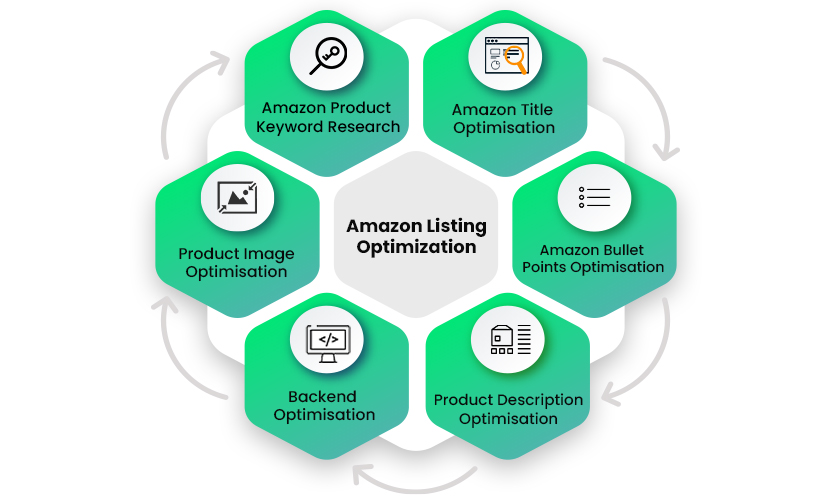
Amazon Listing Optimisation #1 Amazon Product Keyword Research

Are you thinking of optimising your product listing on Amazon? The first step is performing keyword research. Find a detailed list of potential keywords associated with the product you are selling. You can even look at top seller listings and check their keywords. To perform amazon product keyword research, you can use helium 10. 

Amazon Listing Optimisation #2 Amazon Title Optimisation

1) The ideal format for writing the title of the listing is to start with “Keyword by Brand Name” or “Brand Name Keyword.” Keeping the brand name up front in the title will infuse the audience’s mind that the brand is important. With this, subconsciously, you start building your brand image. 

2) Try to incorporate other targeted keywords along with the points that add value, such as product benefit, specification or differentiators that distinguish the product from competitors. Avoid overstuffing too many disconnected keywords and try to keep the title readable and simple. 

Note: Amazon restricts the usage of terms such as superior quality, best product etc. 

3) Take out three to four priority keywords with high search volume and try to incorporate them in the first 80 characters. Place the main keyword at the front position of your title. With this, you can target mobile users as well as the mobile view generally displays up to 80 characters

4) Make the title readable. For this, you can use “|” “,” or “-“. These separators help visitors scan the points you have covered easily and are useful from an SEO perspective. 

Amazon Product Keyword Research

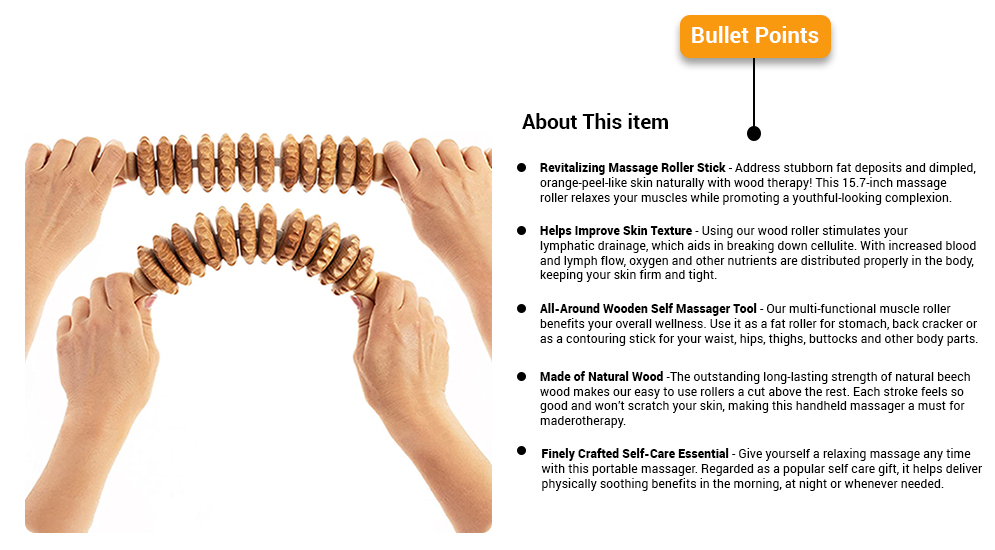
Amazon Listing Optimisation #3 Amazon Bullet Points Optimisation

Amazon offers 1000 characters for describing the key features of your product. These 1000 words are vital to hold the attention and convert the visitor to a potential customer. It is better to bring up a variety of information through different bullet points.

What does the bullet list include?

1) The first point should be attention-grabbing. It should include the product’s unique selling points and must closely align with what makes your product different from competitors. 

2) The next point must describe the product’s benefits, specifications, physical features, dimensions, functionality, applications etc. 

3) Your bullet point must address the answers to all the questions that can strike the user’s mind before purchasing the product. 

4) The point can include packaging information (how many products will be bundled in one pack), how to use, free gifts available, combo product information etc. 

5) It is better to mention the trust-building factors, including return policy, money-back guarantee (if offered), name of the authority that certified the product etc. 

Note: Bullet points must include keywords. Also, it is better to summarise each bullet point in a few words before describing it further. For e.g.

ALL-SEASON COMFORT: Our cotton bedsheet is designed for year-round use and makes a perfect addition to your space.

product listing on amazon

Amazon Listing Optimisation #4 Amazon Product Description Optimisation

Amazon offers 2000 characters for the product description area. Here you can elaborate on the information mentioned in bullet points, mention additional benefits that could positively impact the user’s life, essential details about the company, real-life usage, and information to support your claims. 

It is better to use short sentences so that it is easier for the buyer to go through them. Do not embellish the information as it can mislead the buyer and lead to bad reviews and ratings. Moreover, you can add medium or low-volume long-tail keywords in the description. 

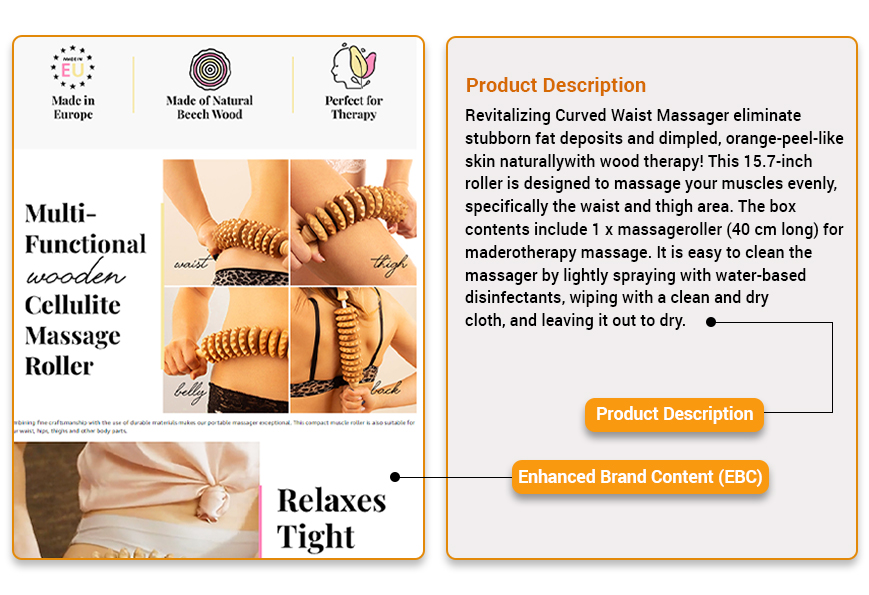
If we go by data, it is seen that creating enhanced brand content or a+ content rather than a simple description contributes to more conversions. Amazon EBCs help shoppers connect well with the products as it narrates the brand story and explains the product in detail with supporting lifestyle images. 

Amazon Product Description Optimisation

Amazon Listing Optimisation #5 Backend Optimisation

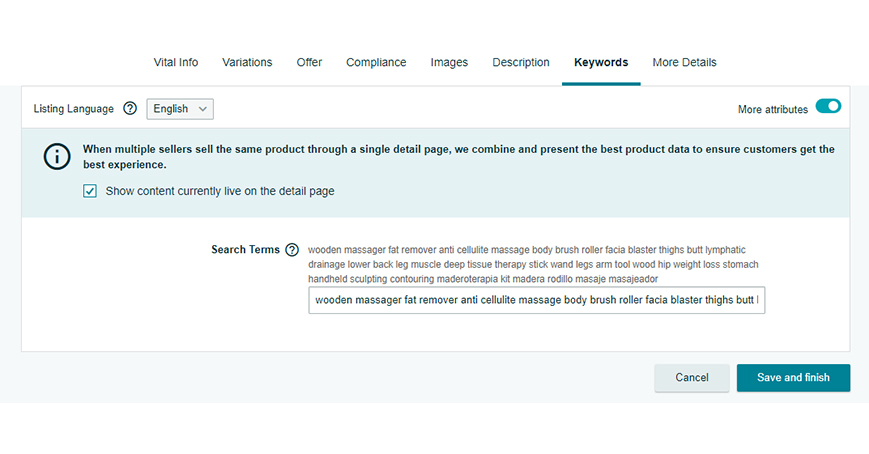
Amazon allows sellers to add backed keywords to help brands get more relevant traffic. Your audience cannot see these keywords (as they appear at the backend of the amazon product listing), but your listing will still rank on them. 

  • Follow the ideal length for backend keywords, which is 250 characters. 
  • Avoid the duplication between backend keywords and frontend keywords. 
  • Remove repeated keywords, competitor ASINs or brand names. 
  • Add relevancy and depth to the generic keywords, assuring your hold. 
  • Include product’s common misspellings, abbreviations, applications and demographics. 
amazon product listing

Amazon Listing Optimisation #6 Product Image Optimisation

Amazon allows you to upload nine images, including the main image. Focus on lifestyle images showcasing the product’s usage, function, features, and specification. The uploaded image should be of high quality, 1,000 pixels wide and 500 pixels high.  

The lead image must have a pure white background (Hex colour #ffffff) and no added props, labels, images or text. It is better to show the product from various angles for the remaining images, and the product must cover 85% of the image space.

amazon product rankings

The Bottom Line

Need help with the amazon product ranking and amazon listing optimisation? Whether you are launching a new product or have already listed the product on amazon, you must optimise the listing correctly to draw better reach and conversation. Our Amazon listing optimization services can help your product stand out from the crowd. 

Amazon New Product Launch Blueprint


Outstanding Strategy to Launch a New Product on Amazon

Are you organizing to launch the latest product? Product launching is always one of the most significant steps towards enhancing a business, specifically for manufacturers. Yet, before launching your product, ensure a proper execution plan. Without a robust strategy, it will be more like nobody knows it. Master the art of How to Launch a New Product on Amazon with us.

What is a Product Launch?

A new product launch refers to a business’s collaborative effort to premiere a new product in the market and make it effectively accessible for everybody. This systematic procedure releases a new product for sale and is as essential as developing a unique product at first.

 Around 60% of customers love it when brands launch new products. Yet, every launch comes with unique challenges because every product is fantastic. Launching a new product on Amazon permits brands to:

  • Remain competitive.
  • Drive sales.
  • Gather feedback.
  • Remain top-of-mind with customers.

Amazon’s new product launch can be tricky, especially if you’re a new or amateur seller. Driving your listing from launch to a prospering stage could be time-consuming. You might need to pay attention to a few key points.

Amazon listing

A successful product launch on Amazon can be thrilling and demanding at once. It takes effort and patience to turn out as amazon’s best seller. To launch a successful product on Amazon, an Amazon seller needs to understand SEO on Amazon. More precisely, Amazon’s A9 Algorithm. As this algorithm loves conversions, it conveys to Amazon that the product bought is absolutely what the buyer has searched for. Besides, the more your listing converts, the more likely Amazon will rank you for relevant keywords. 

Why is it Crucial to Have a Product Launch Strategy?

The extract of a product launch strategy is to recognize the appropriate time and market for the product. In addition to banishing inconsistent marketing campaigns, it further helps point out the target, confirming good sales. Without an established product launch strategy, it becomes laborious for a brand to catch the grip. While using the amazon launchpad, ensure curating the relevant product marketing strategy. 

Product Launch Strategy

Step-by-Step Process for a New Product Launch in the Market:

1.Product Sourcing

Assembling complete information is the first step toward becoming an amazon top seller. Knowing your customer better makes it even easier. Finding the appropriate product for your target audience sets your product sourcing right. Do particular keywords & product research and request quotations from potential suppliers.

2.Product Management

This process includes various tasks that add value to the new product via the amazon launchpad. The significant targets must be creating universal product code (UPC), packaging, and product manuals. Besides, the conceptualization, design, development, and marketing of newly-produced goods are a crucial part of this process .

3.Setting Up Delivery Process

This process begins at your manufacturer and ends at the warehouse. Thus creating an amazon listing and a detailed shipment plan is a must. Coordinating delivery rates is yet another aspect. You must arrange for a consignment forwarder to organize your shipments. 

4.Pre-Launch

It refers to the product launch advertising before the officially launched product is made available. It creates product awareness, boosts excitement around the forthcoming launch, and creates valuable leads.

It also focuses on a few remarkable stages, including:

  • Product photography – You add product photos from multiple angles to ease it up for buyers. They should be clear and comfortably zoomable. 
  • Considering influencers – They review your new product and share it on various platforms to generate the buzz and connect GenZ to your launch. You can also announce an Amazon giveaway winner and popularize your product.
  • Product imagery – Here, you involve your images of infographics, lifestyle shots, specifications shots, etc.
5.Listing Creation

Amazon listing optimization is decisive of all steps in launching a new product. It customizes your product listing so that you gain the highest possible rank. Your product rises or falls in the search results depending on how you build the front and back end of your product listings.

At this point, you must add A+ content, product information and upload the product photos and imagery. You should also add lifestyle images that showcase everyday scenarios of using your product. 

6.Launch

The launch team must work closely on finalizing the launch date that suits your product the best. On your launch day, you finally release your product to the world. At last, you make those amazon listings live and keep an eye on your product page.

At times it’s not feasible to launch a new product through grand events. In such a case, you can opt for an online platform to launch your new product. 

7.Round-The-Clock Maintenance

Your work doesn’t get over with your launch day. Setting on the regular maintenance remains the essence that ensures your consistent growth and maintains the trajectory of your sales. Generating sponsored ad drives, reviewing business reports, checking suppressed listings, and performing split testings differentiate you from other sellers on amazon seller central. 

8. Gather Feedback after Your Launch

Examine customer response to determine what changes you need to make to enhance your product. There are different ways to collect this feedback:

  • Product satisfaction surveys
  • Emails
  • Net promoter score
  • Community 

We hope this article helps you launch a best selling product on Amazon launchpad. However, there’s no guarantee that a new product will succeed in the marketplace but correctly timing your launch can make your debut and product noteworthy. 

Amazon Storefront Creation and Management Services for Sellers and Vendor


With thousands of sellers and a massive customer base, Amazon has been the most popular eCommerce platform among retailers and buyers. However, with new sellers entering this marketplace, the competition is getting tougher with each passing day. It is vital to think over the conventional techniques and utilise the power of extraordinary features that amazon offers to stay on the top and get the most out of this potential platform.

You must have heard, implemented, and benefited from enhanced brand content. One of the similar ways to reach greater positions and give an immersive visual experience to your customers is through Amazon storefront design.

So, now you must be wondering how to get started with Amazon storefront creation and management. Don’t worry; we have got your back. The blog deals with detailed steps to creating Amazon storefront and Amazon store management services.

Why is Amazon storefront creation and management essential?

Amazon Storefront is a simple drag-and-drop product that allows the creation of multi-page stores to display value propositions and products on Amazon. With these customisable pages, one can showcase a single or group of items, including videos, texts, and other types of content. Amazon Store surges the buyers’ experience by:

  • Offering an enhanced mobile and desktop experience
  • Leveraging both external and internal sources of traffic 
  • Boosting organic ranking on amazon search engine
  • Introducing the brand to newer audiences and promoting products to pre existing customers 

Are you Eligible for Creating an Amazon Storefront?

Enrolment in the Amazon Brand Registry program is essential for Amazon storefront creation and management. The entire process of setting up a store is easy and free for sellers, vendors, and agencies. 

How to cCreate Amazon Storefront Design?

Embark on the journey of Amazon storefront creation and management with these steps.

Step 1: Sign Up for a Professional Seller Account

The first step towards Amazon storefront creation and management is signing up for a professional amazon seller account. You need to provide basic details, including name, business contact details, email address, password, and payment information. Along with this information, amazon asks for your credit card details to charge the monthly fee of $39.99. Note that you must have the US back account number for payment. 

Step 2: Register with Amazon Brand Registry

Once you get the approval for a professional selling account, the next step is applying for Amazon Brand Registry Program (ABR). The Amazon Brand Registry program provides various tools to improve the brand on Amazon, including enhanced advertising and marketing features, access to restricted selling categories, and professional presentations.

Step 3: Start Designing the Store

You can start creating your store as soon as the brand is registered with Amazon Brand Registry. For this, you can choose either way:

  • Log in to seller central > Stores > Manage Stores
  • Ad Console > Stores > Create Store
create storefront

Step 4: Build Home Page

The home page is the first page customers will see on visiting the store. Creating a home page requires:

  • Brand Display Name & Logo: You need to write your brand name and upload the logo with high quality.
  • Page Meta Description: Make your meta description informative and catchy. It is a vital part of the store as it helps rank your amazon store and, at the same time, gives visitors a preview of your products and brands.
  • Templates: Product highlight, product grid, and marquee are some templates that amazon provides so that you can creatively narrate your brand’s story, highlight your best-selling products or display all products altogether in one grid. Moreover, you can even start from scratch by choosing a blank page template.
storefront templates

Step 5: Create Additional Pages

After building the home page, it is time to create additional pages depending on the discount, deals, best-selling products, catalogue categories and more. It is important to note that you design pages in such a way that navigation within the page or to other pages is easy so that the visitors can easily get what they are exactly looking for without investing time and effort. 

Step 6: Addition of Content Tile to Every Page

Set the proper hierarchy of pages and then add content tiles to these pages. Content tiles include images, videos, galleries, titles, product grids, and navigation.

storefront content tiles

Step 7: Upload Your Products

Once the design layout of additional pages is ready, you can add the product by assigning Amazon Stand Identification Number (ASIN to every product. You just need to copy-paste the respective ASIN.

Step 8: Check the Preview and Submit

You can click on the store preview option to check how your store will appear on desktop and mobile. Thoroughly check spelling mistakes, image or branding inconsistencies, grammatical errors, content titles, product images and navigation issues. Once done, submit the store page to Amazon for review. The store will get automatically published once the review is done. 

How to manage an Amazon Brand Store?

Amazon understands the need for continuous store optimisation and thus allows sellers to upgrade and edit their store pages to maximise their chance of success. 

Amazon brand store management services include: 

  • Auditing the store frequently and taking required actions to drive brand awareness and sales. 
  • Working on design and layout to offer a top-notch user experience. 
  • Showcasing the products and brand in a way that compels visitors to take action. 
  • Optimising your product subcategory and category classification. 
  • Creating compelling though SEO-optimised product descriptions 
  • Continuously researching new trends, monitoring and updating the product data when required.

Due to time constraints, many sellers do not pay heed to Amazon store management and land with poor sales and revenue. HRL Infotechs, the top storefront consultancy, has got your back! We have a dedicated team of professionals who can help you manage your storefront efficiently. They conduct in-depth research about trends and competitor stores to create an optimisation strategy that makes you stand out from the crowd and enjoy better sales. 

Amazon Storefront- Escalate your Organic Sales


Enhancing Amazon Storefront Designs for Better Organic Sales on Amazon

One of the most renowned e-commerce retailers with an enormous seller and customer base. Are you selling on this vast e-commerce platform? Through Amazon Storefront you can stand out among 2.2 million active Amazon sellers. Opening an Amazon Storefront can help you differentiate your brand from your competitors and build customer trust. Amazon is truly the best place to highlight your unique value proposition.

An Amazon Seller Central Store is your own custom branded website on Amazon. Registered brands can showcase their products without distractions from competitors’ products or ads. With Amazon’s vast audience reach, it’ll have the look and feel of an e-commerce store. 

Are you building a Store? Amazon Storefront is a free self-service advertising tool. It is for creating a devoted brand destination on Amazon. It is an incredible way to showcase your top-selling products. Consequently, it increases brand awareness through an easy-to-navigate interface. These Storefronts provide small and mid-sized businesses with a platform for selling products.

HRL Infotechs has years of experience setting up a perfect Optimized Amazon Brand Storefront for clients. That aided them in surging their business and took their dollars higher.

Here are some best Practices to Upgrade Your Amazon Storefront:

  • Convey your story through your Storefront- Amazon organic sales Storefront is a unique but expressive way. Influence your customers through your brand’s story and rank them as top-selling products. 
  • Tailor your storefront design around customers’ pain points- You can design your Amazon Marketplace Store around the issues that trouble your customers the most. Because solving the problems is an eminent way to fascinate potential buyers. This way, you can meet maximum sales.
  • Cater to the type of customers you want to attract- Do a proper study about the behavior of your target audience on Amazon. Figure out their thinking process, likes, and dislikes. In this manner, you can throw a perfect and captivating storefront strategy to attract them.
  • Create sub-pages- Do not paste everything on your home page and mess it up; Instead, create a few sub-pages. Categorize better and arrange your products on various pages for easy navigation.
  • Truthful statements and clear CTAs- What is the best policy to gain customer loyalty? Most importantly, be honest with them to retain them long-term. It will make your customers buy from you again and again. Moreover, keep clear and visible Call-to-action buttons for ease for customers.
  • Attraction and engagement- Put compelling videos and photographs of your products. And put your products on multiple pages with categories and full-width images to optimize amazon organic sales brand pages. You can also show reviews on your brand page to capture customers’ attention.
  • Functional on mobile and desktop- Two-thirds of the searches are from mobiles. So, ensure your storefront is accessible from phones. It can enhance your customers’ experience and build a good brand image.

Don’ts of Amazon Storefront Optimization:

  • Avoid staggering your viewers- Make sure your store has easy navigation. Just keep it simple and accessible. Avoid creating confusing store designs for better engagement of your customer. 
  • Never violate the Amazon terms of service- Appropriately conducting business is the key to customers’ hearts. Abide by Amazon’s policy, or you would have to suffer severe consequences. That can even make your brand ineligible to sell on Amazon. 
  • Don’t use harmful practices- Protect your clientele to protect your enterprise. Indulging in harmful practices is an easy way to hurt your business reputation on Amazon. It will affect the confidence and trust of clients in you. Treat your customer’s data as confidential and Keep at arm’s length from unfair pursuits.
  • Prevent misleading the customers- If you do not wish to jeopardize your brand image, do not mislead them. Misguiding them can get you bad words of mouth. As it could reduce your rating, and you can also lose customer retention.
  • Beware of messy interfaces- Sometimes, the interfaces are all messed up, reducing engagement. Try to keep your store systematically arranged to narrow down the chaos. 

Amazon storefront optimization

Conclusion

Amazon Storefront is an appealing way to optimize brand pages with no competitors’ or ads presence. Refurbish your Organic Sales on Amazon. Highlight your eccentricity and what differentiates you from others. In other words, an optimized Brand Store page is the best way to customize your presence on Amazon.

Amazon store design

Refurbish your Amazon Marketplace Storefront by creating categorized sub-pages. Claim customers with nobility and exemplary practices, including clear CTAs on the pages. Besides this, there are a few things you need to keep away from to magnify your business presence on the leading platform. For instance, violating the terms of services or deluding the product buyer with unfair practices.

Get expert assistance at HRL Infotechs to win the lead and gain a competitive advantage with an optimized Amazon Storefront.

Absolute Guide to Commence an Amazon Seller Account


As Amazon consistently grows, opportunities to build an e-commerce business by selling on the site also grow. The latest trends stipulate that the year ahead holds enormous potential for e-commerce entrepreneurs in 2022.

By now, you might have worked through whether you want to sell on Amazon. Selling on Amazon brings plenty of benefits for you, which include:

  • Get More Customers
  • Low Starting Cost
  • Unbeatable Reach
  • Regularly Secure Payments
  • Services for Every Need
  • International Expansion
  • And appreciably more…


Why Become an Amazon Seller?


As an Amazon Seller, your products are available all day and night to crores of customers & businesses in India’s most visited shopping destination. Six lakh+ enterprises, big and small, sell on Amazon at present. If you’re grappling with whether to sell on Amazon or if you should stay on the platform, consider all these factors mentioned above.

Now you’re set to sign up as a seller. So what happens when you register? As an Amazon Seller, there will be lots of expectations from you. You must take a few prompt steps to prepare your store for the customers.
Let’s guide you to set up an Amazon Seller Account and assist you in accomplishing things you need to do before you list your first Amazon product.


Amazon Seller Account Requirements

After you’ve figured out what you plan on selling on Amazon, you’ll have to go through the Amazon seller registration process, which is pretty straightforward.


1. Sign Up for Amazon Account

It doesn’t matter which way you enter Amazon. Go to amazon services. You can sign up through a few different options too.


 2. Click on “Learn more”

Then reach the “Pricing” tab and click on “Compare selling plans.” It brings you to a comparison page to see the distinction between an individual and a professional seller account.

Note that clicking on the orange ‘Sign up’ button will immediately take you to the registration page for a professional seller. On the contrary, the ‘See pricing’ link exhibits the difference between the individual and professional accounts and permits you to determine which registration you want.


3. Opt Between an Individual or Professional Seller Account

Regarding Amazon’s seller plans, you again have two options: professional and individual. If you plan to sell around 40+ products per month, signing up as a ‘professional’ will be your most acceptable gamble.

Even though you’re selling just as a hobby and don’t regard yourself as a professional, this plan will help you save money.


4. Add Your Email id and Select ‘Create a New Account’

After selecting the best-seller plan, a window screen will appear asking you to type your email id and a password (of your will) for your account.

When you’re done typing, click the ‘Next’ button. It will take you to another screen, affirming you must accept the notification sent to the email address you provided on the initial screen. This way, Amazon confirms your email address.

Please pay attention to an email from Amazon, and approve the notification through the link they impart. Once you agree to it, you’ll be taken to the next screen accordingly.


5. Select Your ‘Business Location’ and ‘Business Type’

The next step is to create an Amazon business account and allocate the following information:

  • Business location
  • Business type
  • Full name

Subsequently, click the ‘Agree and continue’ button.


Become an Amazon Seller


6. Enter Your Personal Information

Afterward, you’ll need to provide Amazon with several personal details. It also includes a form of identification (your passport number or driver’s license).

After everything has been documented, click on ‘Next’ at the bottom of the screen. Ensure the address you’ve put in is correct since Amazon will send you a verification number on a postcard that you must enter before using your account. Again for authentication, you’ll need to provide your mobile number.


7. Enter Your Billing Information

Providing Amazon with your billing information will be your next step, including a genuine bank account number and a valid credit card number. Before proceeding, click on “I Understand.”

You will need to authenticate your bank account on the following page. Post confirming your banking details, you must enter your credit card details.


8. Put the Information for Your Product(s) and the Amazon Store

After supplying your credit card information and validation, you’ll answer a few queries about your Amazon store and the products.
To move on to the next phase of the seller registration process, you’ll need to answer the following:

  • Naming your Amazon store
  • UPCs for your product(s)
  • If any diversity certifications
  • If you’re the maker or brand owner of the product(s).

Clicking ‘Yes’/’Some of them,’ makes you answer: Do you own a government-registered trademark for the branded products you wish to sell on Amazon?
Push the ‘Next’ button once you’ve answered all the questions.


9. Identity Verification

Identity verification next, you’ll need to verify your identity by uploading images of your ID (license or passport) and a bank statement. After uploading them, click Submit.
Lastly, confirm the business address after completing all the other verification steps.

If the address is correct, a new screen will appear after clicking the confirm button. It elucidates you receiving a verification code postcard at that address and a verification code.
Then, after receiving the card, enter the code into the given space and finish the verification process.

Once you’re verified, you’re in!

Congratulations, Now you’re a verified Amazon Seller.